📱 Settings with the BlackVue App
Table of Contents
Using the BlackVue App, you can easily customize and control your dashcam settings from your smartphone.
🔹How to Open Camera Settings
1) From the home screen of the BlackVue app, Tap the connected camera panel to open the camera control menu.
2) Go to “More” and tap “Camera Settings” to adjust your dashcam settings.

🔹Camera Settings
Here’s a breakdown of the main setting categories and what you can adjust.

🎥 Video
H.265(HEVC)

H.264(AVC)

- Resolution: Fixed to 4K UHD@30fps (front) and 4K UHD@30fps (rear).
- Video Segment Length: Fixed at 1-minute clips.
- Video Quality: Select the desired video quality level depending on your preference for video clarity and file size.
-
Extreme (H.265_60Mbps): ~469MB per minute (highest clarity, largest file size)
Extreme (H.264_40Mbps): ~312MB per minute (highest clarity, largest file size)
High (30Mbps): ~236MB per minute
Medium (20Mbps): ~164MB per minute
Low (10Mbps): ~87MB per minute (smallest file size, lower clarity)
Higher video quality settings increase the clarity of recordings but also increase the size of each recording file. Choose a setting that best balances your need for video detail and available storage.
- Audio Recording: Toggle on/off to include or exclude sound.
- GPS Location Recording:
Your dashcam includes GPS tracking, which records your vehicle’s location and speed. This feature is enabled by default.
If you turn off GPS location recording:
- Your driving route and location will not be saved or sent to the cloud, helping protect your privacy.
- However, some core features like speed-based alerts will continue to work normally.
📌 What changes when GPS location recording is OFF:
|
Feature |
Behavior |
|
🗺️ Live View (Map) |
Map does not show GPS location information |
|
📍 Camera List (Map View) |
Your car’s location is not shown |
|
🎞️ Video Playback (Map) |
Map does not show GPS location information |
|
📡 GPS Tracking |
Not supported |
|
📌 Geo-Fencing |
Not supported |
|
📊 Drive Report |
No location-related data shown |
|
📤 Live Event Upload (Map) |
Map does not show GPS location information |
|
⏱️ GPS Time Sync |
✅ Still works |
|
🚗 Speed/Driving Events (e.g., overspeeding, hard braking) |
✅ Still work |
💡Tips: If privacy is a concern, turning off GPS is a good option — and most driving performance features will still function as usual.
-
Camera Rotation: Flip or mirror the image if the camera is mounted upside down.

-
Video Overlay: Toggle overlay elements such as date/time, speed, and custom text.


🎞️ Recording Mode
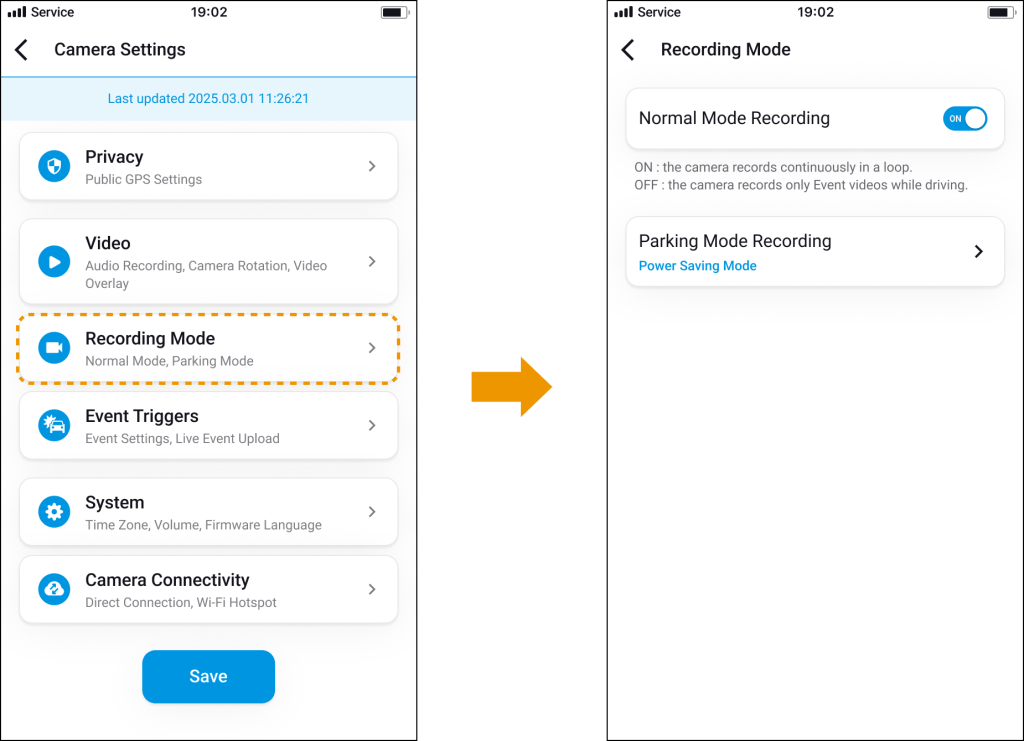
-
Normal Mode Recording: Enable/disable continuous recording while driving.
-
Parking Mode Recording: In parking mode, your dashcam continues to monitor your vehicle even when the engine is off. You can choose from the following three modes.
Parking Mode Recording
![]()
1) Power Saving Mode
-
🔋 Ideal for long-term parking
- The dashcam enters a low-power state to conserve battery.
- It does not record continuously — instead, it wakes up only when an impact is detected and saves an event video.
📌 Note: Power Saving Mode does not support pre-buffering, and event video recording begins within 2 seconds of the impact detection.
-
Great for reducing power consumption while still capturing important incidents.
2) Time Lapse Mode
-
🎞️ Efficient continuous monitoring
-
The dashcam records 1 frame per second and saves it as a 1-minute video (which plays back 30x faster).
-
Good for reviewing overall parking footage without using too much storage.
3) Motion Detection Mode
-
🚶 Standard parking surveillance
-
The camera continuously buffers video, and starts recording when motion is detected in its field of view.
-
You can also customize motion sensitivity and exclude specific detection zones to reduce false triggers (e.g., from trees or passing shadows).
📌 Note: In all modes, any detected impact will always trigger an event recording.
Battery Protection
Automatically powers down the camera to avoid draining the vehicle battery (requires hardwiring).

-
Low Voltage Cut-off
Shuts down the dashcam when the vehicle battery voltage drops below a preset threshold.
This prevents excessive battery drain that could affect engine start-up.
The voltage threshold can typically be adjusted from 11.8V to 12.5V for 12V systems (or 23.6V to 25.0V for 24V systems), depending on your preferences and vehicle type. -
Timer Cut-off
Powers off the dashcam after a preset duration of Parking Mode recording.
You can choose the cut-off timer (e.g., 6 hours, 12 hours, 24 hours, etc.) to limit the operation time while parked, even if sufficient voltage remains.
This helps preserve battery life during extended parking periods.
🚨 Event Triggers

- Manual Recording: Turn on/off manual recording via the touch sensor.
- Driving Impact: Adjust G-sensor sensitivity to detect impacts while driving.
- Parking Impact: Enable recording for impacts while parked.
- Event File Protection: Lock and protect up to 50 important recordings.
- Speed Alert: Record events when exceeding a set speed.
- Hard Acceleration / Braking / Cornering: Detect sudden movements and trigger recordings.
- Live Event Upload: Upload event videos to the cloud automatically. (BlackVue Cloud Service)
-Manual Recording / Driving Impact / Parking Impact / Speed Alert / Hard Acceleration / Hard Braking / Hard Cornering events can be applied to Live Event Upload
- Voice Alerts: Hear a voice notification when an event is triggered, such as an impact, speeding, or reckless driving behavior.
📌Note: BlackVue Cloud Service requires additional setup to unlock the features.
⚙️ System

🕒 Time Zone: Choose your time zone to sync with GPS time or set it manually. You can also enable Daylight Saving Time to automatically adjust for summer time.
-
The factory default is GMT -11.
-
Examples of common time zones:
-
GMT-7: Los Angeles
-
GMT-4: New York
-
GMT+0: London
-
GMT+1: Paris
-
GMT+3: Moscow
-
GMT+8: Singapore
-
GMT+9: Seoul
-
GMT+10: Sydney
-
-
If you’re unsure of your offset, visit greenwichmeantime.com to check.
-
When setting time manually, enter the time you plan to use the dashcam, not the current time.
🚗 Speed Unit: Choose between km/h and MPH for speed-related data display.

💡 LED Indicators: Choose which LEDs are active in different modes (recording, parking, etc.).

🔊 System Voice Guidance: Toggle voice alerts on or off.

🎚️ Volume: Adjust voice guidance volume.
🈯 Firmware Language: Change the language used for firmware menus and alerts.
-Korean(한국어) / English(English) / Russian(Русский) / Japanese(日本語)
Simplified Chinese(中文) / German(Deutsch) / French(Français) / Thai(ไทย)
Indonesian(Bahasa Indonesia) / Vietnamese(Tiếng Việt) / Spanish(Español)
Italian(Italiano) / Dutch(Nederlands) / Polish / Norwegian / Finnish / Arabic(عربى)
🌐 Camera Connectivity
Manage how your dashcam connects to the internet or your smartphone. These settings allow for seamless pairing, Wi-Fi setup, and remote cloud access.

📡 Camera Wi-Fi Credentials
Change the name (SSID) and password of your dashcam’s built-in Wi-Fi network.
-
Go to Camera Wi-Fi Credentials to customize your camera’s network name and set a secure password.
-
This is the Wi-Fi you’ll connect to when using direct features like Live View and Playback.
🌐 Wi-Fi Band
Choose between 2.4GHz and 5GHz Wi-Fi bands (depending on your camera model):
-
2.4GHz: Wider range but slower speed.
-
5GHz: Faster speed but shorter range.
📌Note: Make sure your phone supports the selected band when connecting.
🔄 Seamless Pairing
Easily pair your smartphone with your dashcam using Bluetooth.
-
Toggle Seamless Pairing ON to allow automatic connection during setup.
-
If this is OFF, pairing must be done manually via Wi-Fi.
📌Note: Seamless Pairing makes first-time setup quick and easy.
☁️ Hotspot Settings (Remote Access)
If your dashcam is equipped with the LTE connectivity module (CM100GLTE) accessory, there is no need to use a hotspot — the module provides a direct cellular connection to BlackVue Cloud.
Connect your dashcam to a Wi-Fi hotspot to enable access to BlackVue Cloud services — including remote live view, push notifications, and Live event uploads.

1) Select a slot (Hotspot 1 / 2 / 3)
2) Tap “Search Nearby Hotspot” and choose a Wi-Fi network
– Or tap “Add network manually” to enter it yourself
3) Enter the Wi-Fi name (SSID) and password
4) Tap ‘OK’ to save
🔄 About Hotspot 1 / 2 / 3 Slots
Your dashcam allows you to save up to three different Wi-Fi hotspot profiles, labeled as Hotspot 1, Hotspot 2, and Hotspot 3. These slots serve the following purposes:
- Multiple Hotspot Flexibility: If you use your dashcam across different vehicles or locations (e.g., home, office, mobile router), you can save a unique hotspot setting in each slot.
- Automatic Switching: The dashcam will attempt to connect to the saved hotspots in order, starting with Hotspot 1, then 2, then 3 — depending on which network is available.
- Convenient Management: You can edit or replace the Wi-Fi information in any slot at any time by selecting it and updating the SSID and password.
This setup ensures a seamless connection to the Cloud, even when moving between different environments.
✅ Once set up, your dashcam can use the hotspot to access Cloud features like Live View and Live Event Upload.


