
Front camera (Front side)
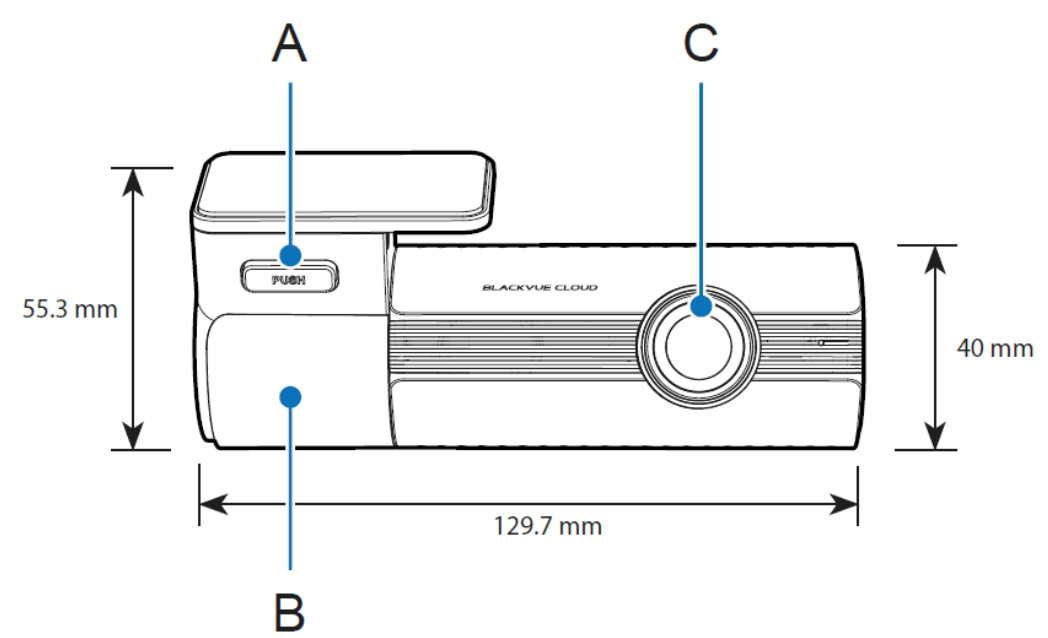
A) PUSH Button
B) Mount Bracket
C) Camera Lens
Front camera (Rear side)
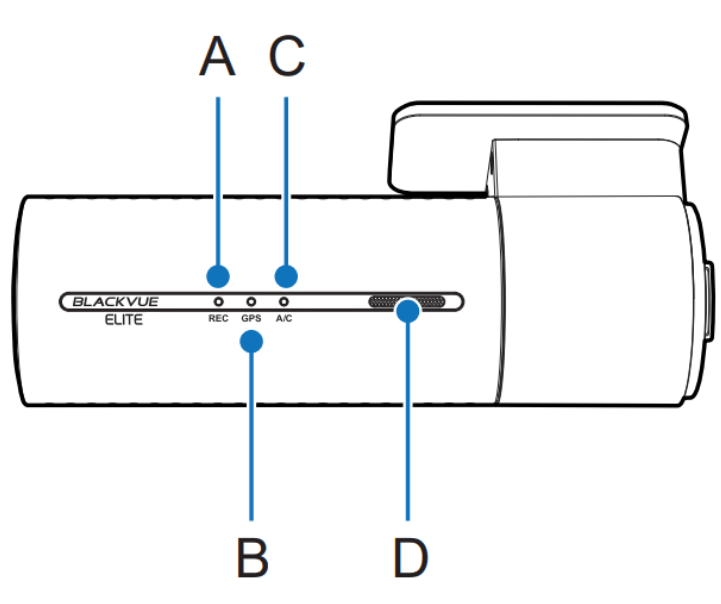
A) Recording LED
 : Lights red is Boot up and Recording mode.
Recording mode like below:
-Normal Recording / Manual Recording / Event Recording / Time-Lapse in Parking / Motion in Parking.
B) GPS LED
 : Lights Blue when GPS on.
C) APP/CLOUD
 : Lights yellow when Cloud connects.
 : Lights white when BT and Wi-Fi paired.


 : Blinks red / blue / white quickly when Reset SD card / Micro SD card and error / Firmware Upgrade.
D) Speaker
Front Camera (left side)

A) Touch Sensor
Press the sensor to trigger a manual recording.
–Touch sensor can be turned on/off in the firmware setting
Front Camera (right side)

A) Cabin camera connection port
B) Micro USB Port
C) DC in (Power connector)
D) micro SD card slot
E) Power Button
-Press and hold for 3 seconds to Power off the camera
-Press the button again to power it on
Note: The camera cannot be powered on while the vehicle’s ACC is off.
F) Cover
Removing and inserting the bracket for Front Camera
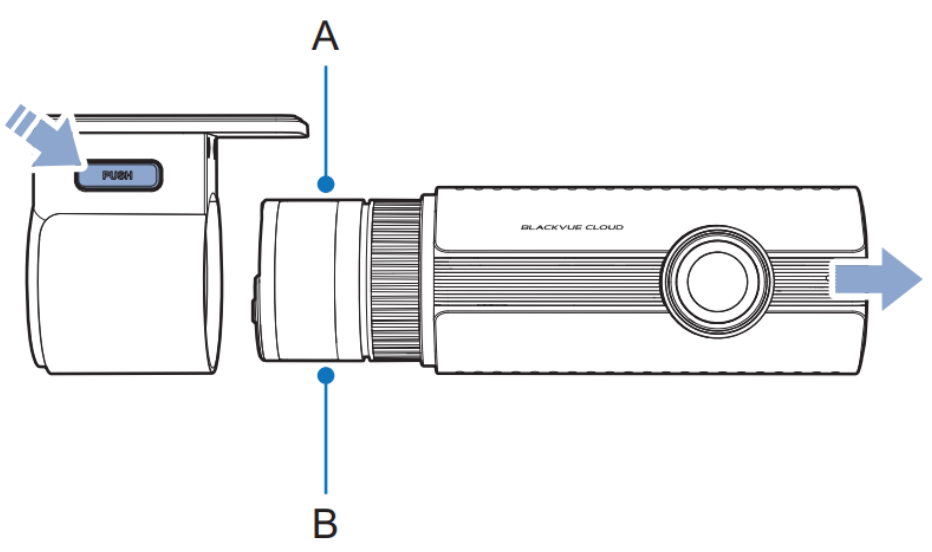
1) To remove the dashcam from its bracket , press the PUSH button and pull the dashcam out of the mounting.
2) To insert the dashcam into its bracket , push the dashcam into the mounting bracket until click in.
Cabin camera

A) Mounting bracket
B) Camera lens
C) Infrared (IR) LED
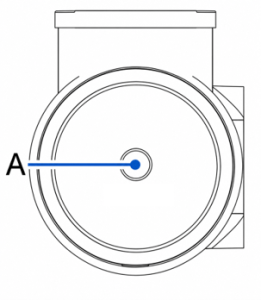
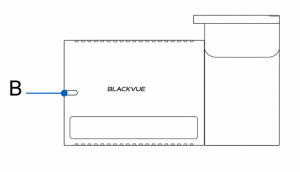
A) Front camera connection port
B) Cabin security LED
Removing and inserting the bracket for Cabin Camera

1) To remove the cabin camera from its bracket, hold the mounting bracket and pull the cabin camera out.
2) To insert the cabin camera into its bracket, push the cabin camera into the mounting bracket until it “clicks”in.


