Connecting your dashcam to BlackVue app #
Register BlackVue account #
Select the video file you want to play from the video list.
1. Search for the BlackVue app in the Google Play Store or Apple App Store and install it on your smartphone.
2. Create an account
a. Select Login if you have an account, otherwise tap create account.
b. During sign up, you will receive an e-mail with a confirmation code. Enter the confirmation code to finish creating your account.

Add BlackVue dashcam to camera list #
3. Choose one of the following methods to add your BlackVue dashcam to the camera list. Once your camera is added, continue to the steps in ‘Connect to Blackvue Cloud’.
3-1. Add via seamless pairing
a. Select Camera in the Global Navigation Bar.
b. Find and Press + Camera.
c. Select Seamless Pairing models. Make sure smartphone’s Bluetooth is turned on.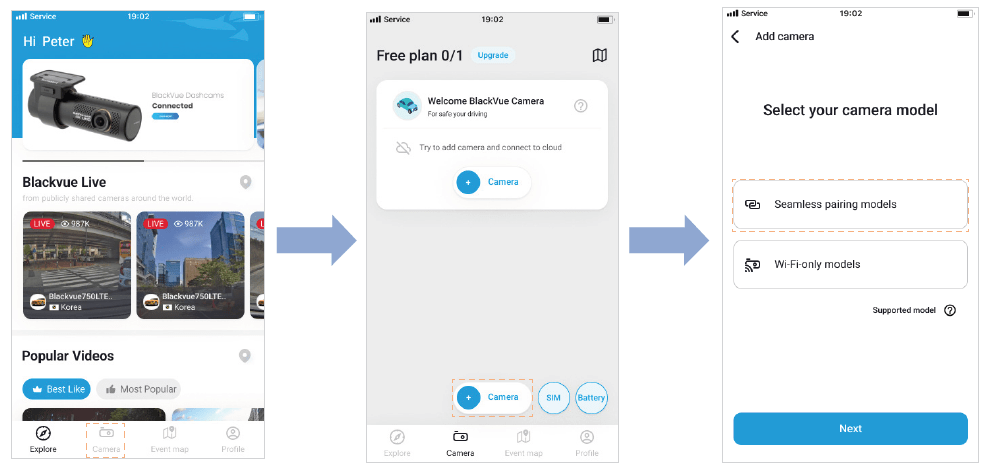 d. Choose your BlackVue dashcam from the detected camera list.
e. Place your hand on the camera’s touch sensor to complete Seamless pairing.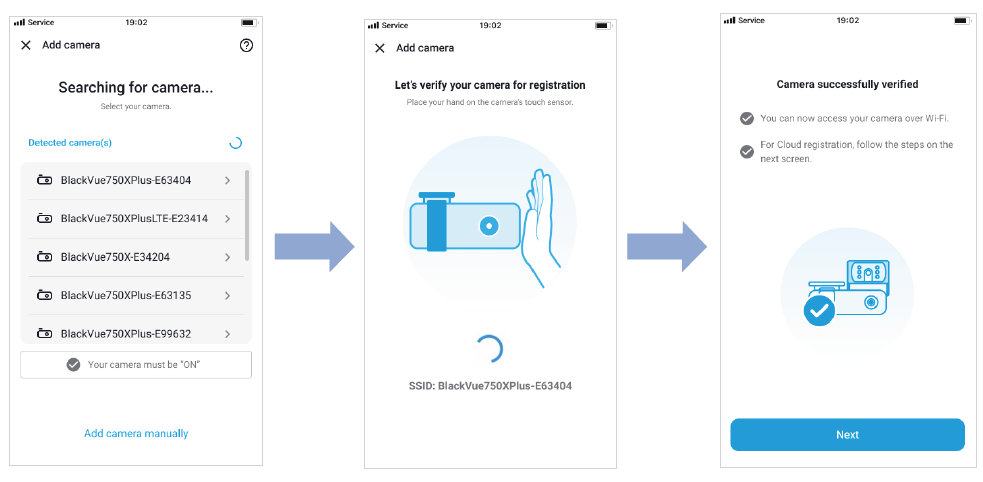 3-2. Add manually
a. If you want to connect to camera manually, press Add camera manually.
b. Press How to connect phone to the camera and follow the instructions.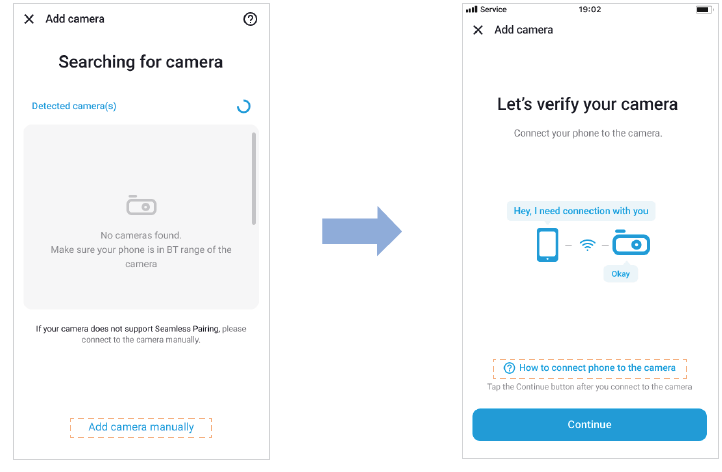
![]() Note
Note
• Bluetooth and/or Wi-Fi direct has a connection range of 10m between your dashcam and smartphone.
• Dashcam SSID is printed in connectivity details label attached on your dashcam or inside the product box.
Connect to BlackVue Cloud (optional) #
If you don’t have a mobile Wi-Fi hotspot, BlackVue connectivity module or if you don’t want to use the BlackVue Cloud service, you can skip this step.
If you have a mobile Wi-Fi hotspot (also known as a portable Wi-Fi router), BlackVue connectivity module (CM100GLTE), a car-embedded wireless internet network or a Wi- Fi network near your car, you can use the BlackVue app to connect to BlackVue Cloud and see in real-time where your car is and the dashcam’s live video feed.
For more information about using the Cloud on BlackVue app, please refer to the BlackVue App manual from https://cloudmanual.blackvue.com.
4. Choose one of the following Cloud connection method. Once setup is complete, continue to steps in ‘Quick settings’.
4-1. Wi-Fi hotspot
a. Select Wi-Fi hotspot.
b. Choose your Wi-Fi hotspot from the list. Enter the password and tap Save.
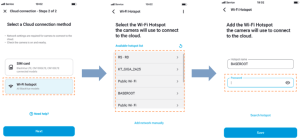
4-2. SIM card (Cloud connectivity using CM100GLTE)
Make sure your connectivity module is installed as instructed by the manuals included in the CM100GLTE package (sold separately). Then, follow the below steps for SIM registration.
a. Select SIM card.
b. Configure the APN settings to activate the SIM card. For detailed information, please check “SIM activation guide” in the packaging box or visit BlackVue Help Center: https://helpcenter.blackvue.com -> SIM Activation Guide.

![]() Note
Note
• When the dashcam is connected to internet, you can use BlackVue Cloud features such as remote Live View and Video playback, Real-time location, push notification, Auto-upload, remote Firmware update etc. on BlackVue app and Web Viewer.
• To use the BlackVue Cloud Service via LTE network, SIM card must be properly activated for Internet access.
• If LTE and Wi-Fi hotspot is available for internet connection, Wi-Fi hotspot will be in priority. If LTE connection is preferred at all times, please remove Wi-Fi hotspot information.
• Some Cloud features may not work when surrounding temperature is high and/or LTE speed is slow.
Quick settings (optional) #
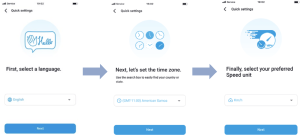
5. Choose your preferred settings. Quick settings allow you to choose your firmware language, time zone, and speed unit. If you prefer to do this later, press skip. Otherwise, press next.
a. Select the firmware language for your BlackVue dashcam. Press next.
b. Select a time zone of your location. Press next.
c. Select the speed unit of your preference. Press next.
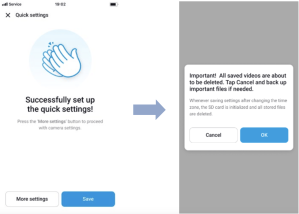
d. Press more settings to access all of the settings or press save. Your dashcam will format the SD card to apply the settings. Press OK to confirm.
e. BlackVue dashcam installation is complete.
![]() Note
Note
• The BlackVue app is available for devices running Android 8.0 and higher, or iOS 13.0 and higher.
• You can change Wi-Fi SSID and password as described on CHANGING / RESETTING WI-FI DIRECT SSID AND PASSWORD
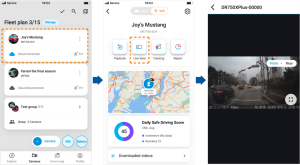
Home screen overview #
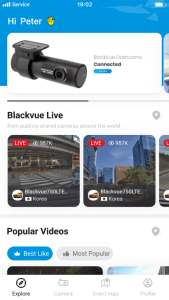
Explore
See the latest product and marketing information from BlackVue. Also watch popular video uploads and live views shared by BlackVue users.
Camera
Add and remove camera. Watch recorded videos, check camera status, change the camera settings and use Cloud functions of cameras added to the camera list.
Event map
See all the events and uploaded videos on the map shared by BlackVue users.
Profile
Review and edit account information.
Playing video #
Playing back videos #
1. Select Camera on the Navigation Bar.
2. Tap your dashcam model in the camera list.
3. Press Playback and select the video file you want to play from the video list.
*Scroll up/down the screen to refresh the video list.
![]() Note
Note
• The playback of ‘Highest (Extreme)’ image quality videos depends on your device’s hardware and software. Older devices may not support ‘Highest (Extreme)’ image quality playback. If you encounter issues please check your device’s video playback capabilities.
Playback screen composition #
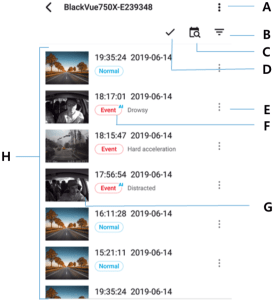
A) Dashcam menu
B) File type Filter
C) Date Filter
D) Multi selection
E) Video file menu
F) File Type
G) Video Source
H) Video list
![]() Note
Note
• All images shown are for illustration purpose only. Actual app may differ from images shown.
Identify video files by recording type #
| Normal | The dashcam records in normal mode by default. | |
| Event | When the dashcam detects an impact while in normal or parking mode, it switches to event mode and saves an event recording beginning 5 seconds before the event trigger. Exceeding the set speed limit will also trigger an event recording. | |
| Parking | In parking mode the dashcam continuously buffers video. When motion is detected in the dashcam’s field of view, it saves a parking recording beginning 5 seconds before the motion detection. | |
| Manual | If touch sensor is enabled in the firmware settings, touching the sensor will trigger manual recording. |
![]() Note
Note
• To filter the video files, press  . Use the
 ![]()
![]() ,
, ![]() ,
, ![]() ,
, ![]() buttons to filter the video list by recording type (Normal, Event, Parking and Manual. The
buttons to filter the video list by recording type (Normal, Event, Parking and Manual. The ![]() filter button displays both E (Event) and I (Impact event while parked) recordings.
filter button displays both E (Event) and I (Impact event while parked) recordings.
Checking the displayed time & GPS data #
The time the video was recorded is displayed in the lower left corner of the video in the playback screen. If the displayed time in the recorded videos is incorrect please see “Time settings” for more information.
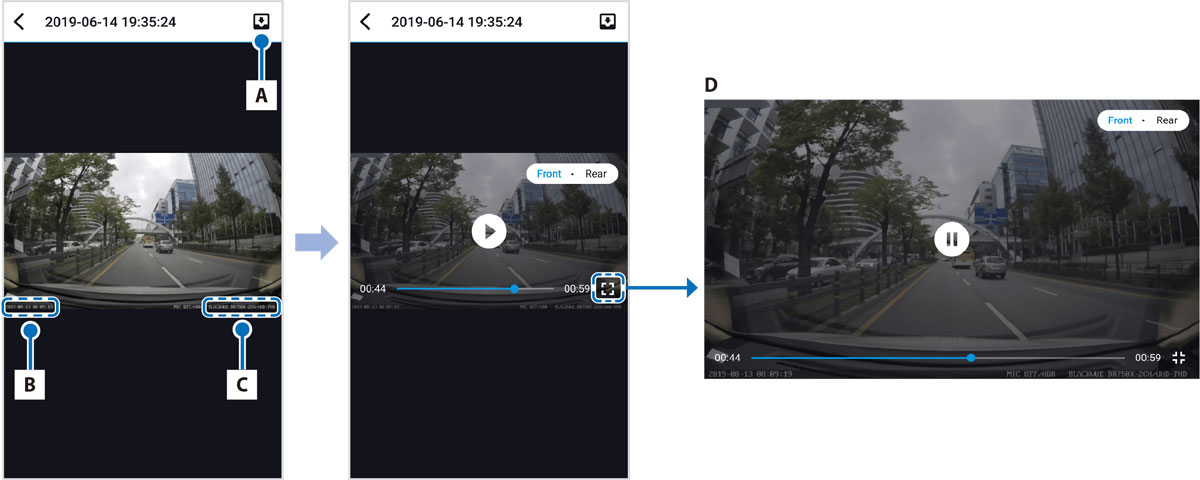
A) Download to Internal Memory
B) Date, Time & Speed
C) Model name
D) Landscapes View
The vehicle’s speed is displayed in the lower-left corner of the video.
1. Tap the screen to playback the video.
2. Rotate your smartphone to switch between portrait and landscape display modes.
Real-time streaming video (Live View) #
You can view in real-time the video currently being recorded by connecting your smartphone to the dashcam via Wi-Fi Direct.
1. Select your dashcam model in the camera list.
2. Press Live View.
3. Rotate your smartphone to switch between portrait and landscape display modes.
![]() Note
Note
• When watching Live View via Wi-Fi Direct, map data isn’t displayed because your smartphone can’t access internet as long as it is connected to dashcam’s Wi-Fi.
Managing videos #
Managing videos in Playback #
You can manage the recorded videos using the BlackVue app.
![]() Note
Note
• When the microSD card fills up, the newest video files will start to replace the oldest video files (called loop recording) – so you will always have the most recent video files.
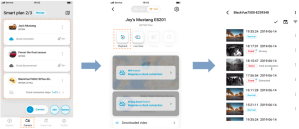
Copy to Downloaded videos #

To copy individual files to your smartphone, tap next to the video you want to copy. Select Download.
To copy multiple files to your smartphone in one go tap  . Select which files to copy, or tap
  to select all files. Select Download.
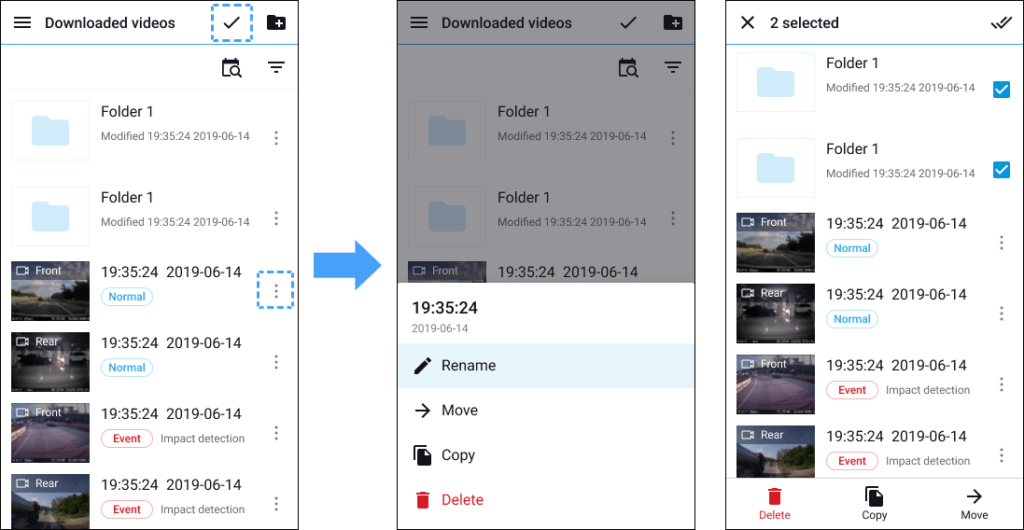
Managing videos in Downloaded videos #
Open the BlackVue app and select Profile > Downloaded videos.
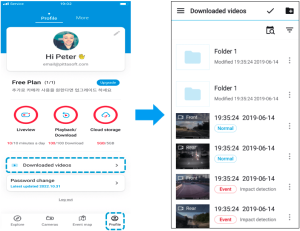
Tap tosee file options. You can delete, copy or move files, change the name of files.
Deleting videos #
To delete individual files, tap next to the video you want to delete. Select Delete.
To delete multiple files from your smartphone in one go, tapand select Delete. Select which files to delete, or tap to select all files. Tap to delete the selected files.
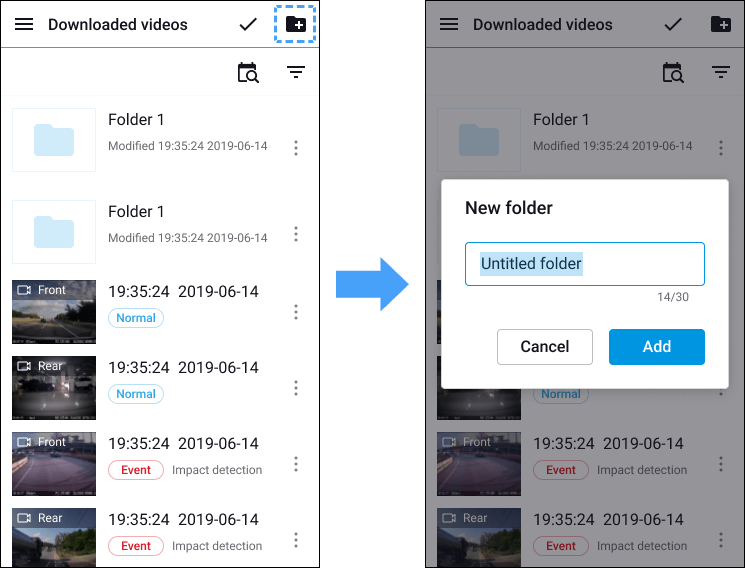
Creating a new folder #
To create a new folder, tap  . Enter a new folder name and press Add.
Deleting a folder #
To delete a folder, tap and select Delete.
Copying and pasting videos #
To copy individual files, tap next to the video you want to copy. Select Copy. Go to another folder and tap  to paste the file there.
To copy multiple files in one go, tapand select Copy. Select which files to copy, or tap to select all files. Tap to copy the selected files. Go to another folder and tap to paste the selected files there.
Moving videos #
To move individual files, tapnext to the video you want to move. Select Move. Go to another folder and tap to move the file there.
To move multiple files in one go, tapat the top of the screen. Select which files to move, or tap to select all files. Tap and go to another folder and tap ![]() to move the selected files there.
to move the selected files there.
Renaming a video #
To change a name of a video, tap next to the video you want to change. Select Rename. Enter a new name and tap Rename.


