Install the front camera behind the rear view mirror. Install the DMS camera on the
driver’s dashboard or front windshield. Install the rear camera externally at top-rear of
the truck.
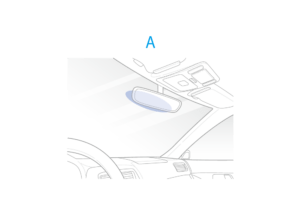

A) Front camera
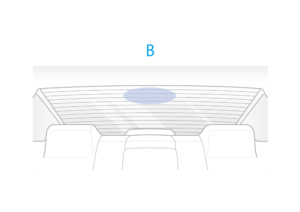
B) Rear camera
C) DMS camera (Sedan)
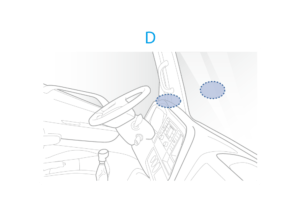
D) DMS camera (Truck)
![]() Warning
Warning
• Do not install the product in a location where it can obstruct the driver’s field of vision.
• Avoid installation where airbags are installed.
1.Turn off the engine. Open the cover of the microSD card slot, gently push the card into the slot until it locks into place and close the cover.

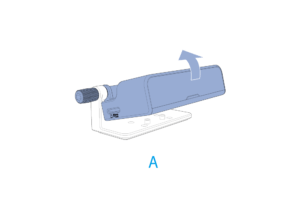
2. Peel off the protective film from the double-sided tape and attach the front camera to the windshield behind the rear-view mirror.

3. Adjust the angle of the lens by rotating the body of the front camera. We recommend pointing the lens slightly downwards (≈10° below horizontal), so as to record video with a 6:4 road to background ratio.
4. Insert the microSD card into the DMS.

![]() Note
Note
• Recorded videos from DMS are saved to the microSD card on the front dashcam.
• The microSD card of the DMS camera is for firmware update purposes only.
5. Peel off the double-sided tape and attach the DMS camera to the dashboard or bottom of the front windshield. Adjust the angle of the lens by rotating the DMS camera. Point the lens so that your face is visible on the DMS camera.

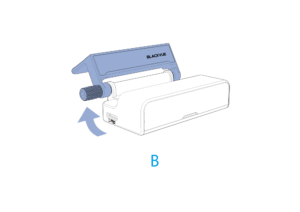
A) Dashboard installation
B) Windshield installation
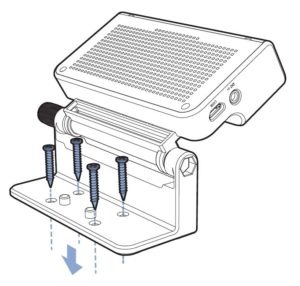
(Optional) For more secure attachment to the dashboard, use the screws included in the box.
![]() Note
Note
• Depending on the mounting position of the product, DMS functions may not operate normally.
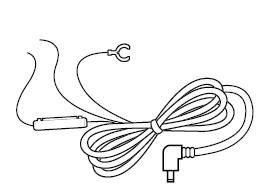
5. Connect the front camera (USB port) and the infrared DMS camera (‘V out’) using the USB connection cable. Connect the front camera (‘Rear’ port) and the rear camera (‘V out’) using the rear camera connection cable.

6. At top-rear of the truck, fasten the rear camera mounting bracket using the included screws to the top of the back of the vehicle.

7. Connect the front camera (‘Rear’ port) and the rear camera (‘V out’) using the rear camera connection cable.

![]() Note
Note
• If the waterproof coaxial cable is mounted externally, we recommend covering it to secure it in place and protect it against the elements.
8. Connectivity Module (Optional): If you want to use the interior camera and the connectivity module at the same time, use the USB hub (included in the package). Connect the USB cables of the interior camera and the connectivity module to the hub. When the cables are all connected, close the cover of the hub and use the Allen wrench to tighten the screw. After that, connect the hub to the front camera and attach it to the behind of the rear-view mirror. Attach the connectivity module to the top corner of the windshield. Use the pry tool to tuck in the cables.
 A) Multiple USB ports
B) Cover
![]() Note
Note
• Interior camera connection cable or Connectivity module cable can be connected to either ports of the USB hub.
9. Plug the cigarette lighter power cable into the cigarette lighter socket and the front camera. Skip to 13 for Hardwiring Power Cable setup.
10. Use the pry tool to lift the edges of the windshield trim/molding and tuck in the power cord.

A) When using dashcams only
B) When adding connectivity module
11. Turn on the engine. The BlackVue dashcam will power up and start recording. Video files are stored on the microSD card.
12. Turn off the engine. The dashcam will automatically stop recording and power down. To record in parking mode while the engine is off please connect the Hardwiring Power Cable (included in the box) or install a Power Magic Battery Pack (sold separately). A Hardwiring Power Cable uses the automotive battery to power your dashcam when the engine is off. A low voltage power cutoff function and a parking mode timer to protect the automotive battery from discharge is installed in the device. Settings can be changed in the BlackVue App or Viewer.
13. Locate the fuse box to connect the hardwiring power cable.
![]() Note
Note
• Location of the fuse box differ by manufacturer or model. For details, refer to the vehicle owner’s manual.
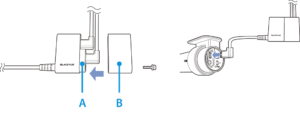
14-1. After removing fuse panel cover, find a fuse that powers on when engine is turned on (ex. cigarette lighter socket, audio, etc) and another fuse that remains powered on after the engine is turned off (ex. hazard light, interior light). Connect the ACC+ cable to a fuse that powers on after engine start (Front camera hardwiring cable (3p)) and BATT+ cable to a fuse that remains powered on after engine is turned off (Front camera hardwiring cable (3p) + DMS camera hardwiring cable (2p)).
Front camera hardwiring cable (3p)
DMS camera hardwiring cable (2p)
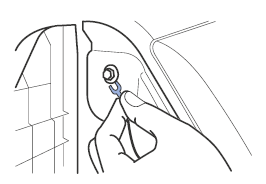
14-2. Connect the GND cable to metal ground bolt (Front camera hardwiring cable (3p) + DMS camera hardwiring cable (2p)).
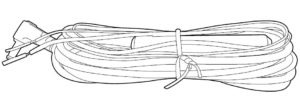
15. Use the pry tool to lift the edges of the windshield trim/molding and tuck in the cables and the power cord.
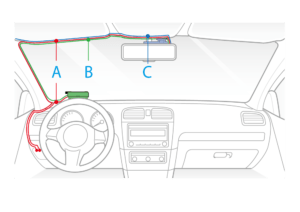

A) Power cord
B) DMS camera connection cable
C) Rear camera connection cable
D) USB Hub connection cable
E) Connectivity module connection cable
16. Connect the power cable to the DC in terminal of the front and DMS cameras. BlackVue will power up and start recording. Video files are stored on the microSD card.
![]() Note
Note
• Up to 50 event recordings (impact, manual) can be locked from being overwritten. By default, this feature is enabled. In the firmware settings, you can choose to either overwrite them with new event files when the event file storage is full or lock the 50 event files and save the new event files in loop recording storage. Please note that formatting the microSD card deletes all the recordings including the locked event files.
• The recording LED is on while recording (default setting) and the GPS LED is on when a GPS signal is received. There are 4 recording modes: Normal, Event, Parking and Manual. The dashcam starts recording in normal mode, switches to event mode when an impact is detected, and switches to parking mode when the vehicle is turned off (Hardwiring power cable, ACC+) or stationary for 5 minutes (Cigarette lighter power cable, G-sensor). Touching the proximity sensor turns on/off audio recording or triggers manual recording depending on the firmware settings.
• When you run the dashcam for the first time the firmware is automatically loaded onto the microSD card. After the firmware has been loaded onto the microSD card you can customize settings using BlackVue Viewer on a computer.
![]() Note
Note
• When you run the dashcam for the first time the firmware is automatically loaded onto the microSD card. After the firmware has been loaded onto the microSD card you can customize settings using BlackVue Viewer on a computer.
• To record in parking mode while the engine is off, connect the Hardwiring Power Cable (included in the box) or install a Power Magic Battery Pack (sold separately). A Hardwiring Power cable uses the automotive battery to power your dashcam when the engine is off. A low voltage power cut-off function and a parking mode timer to protect the automotive battery from discharge is installed in the device. Settings can be changed in the BlackVue App or Viewer.
• DMS (DMC100) functions only when vehicle is in operation.


