- BlackVue Mount installation Guide.
A. For customers replacing only the mount on an existing vehicle. #
Step 1. Disconnect the Dash Cam and Cables
-
Disconnect all power, GPS, and video cables from the front and rear cameras.
Step 2. Remove the Existing Mount
-
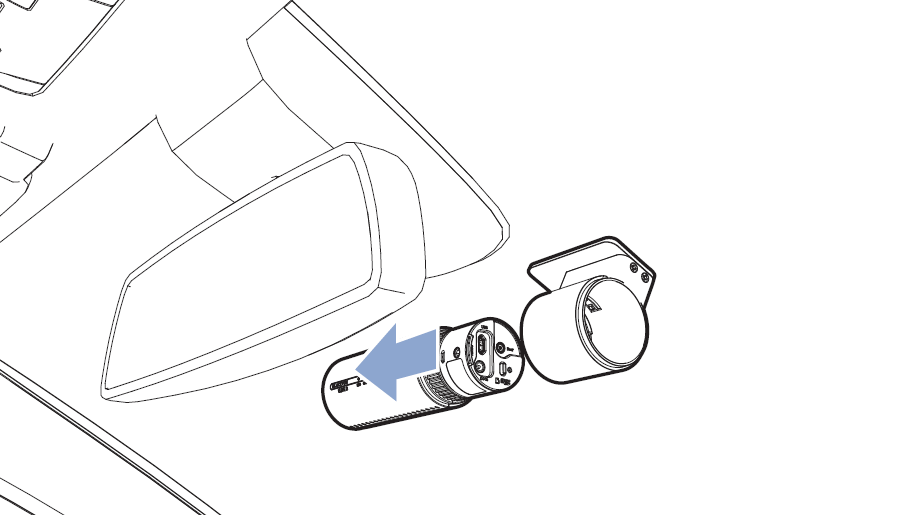
First, remove the camera body from the mount.
-
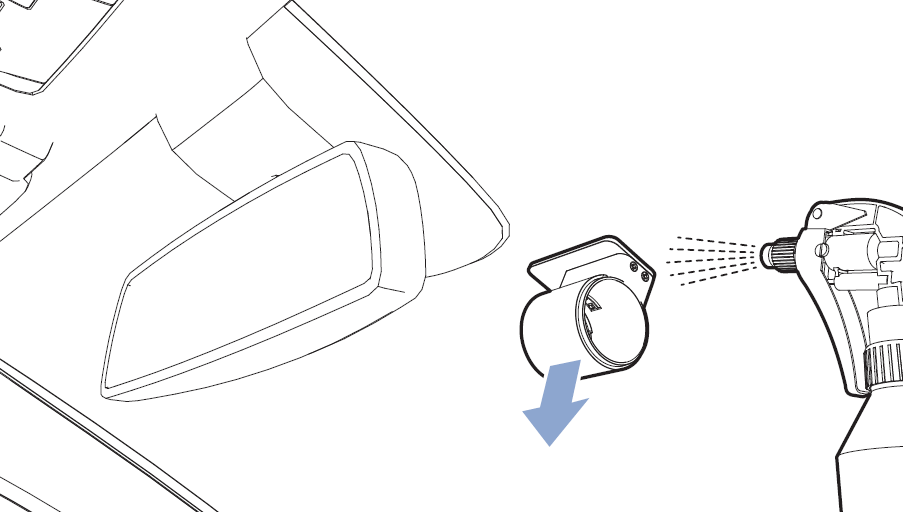
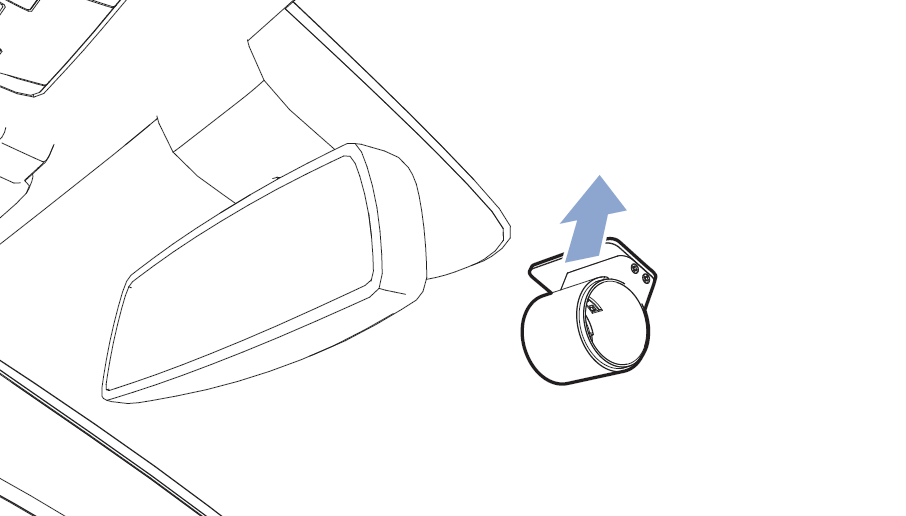
Spray water or alcohol around the mount continuously to weaken the adhesive, then gently shake and remove it.
-
Use the same method to remove the rear camera mount.
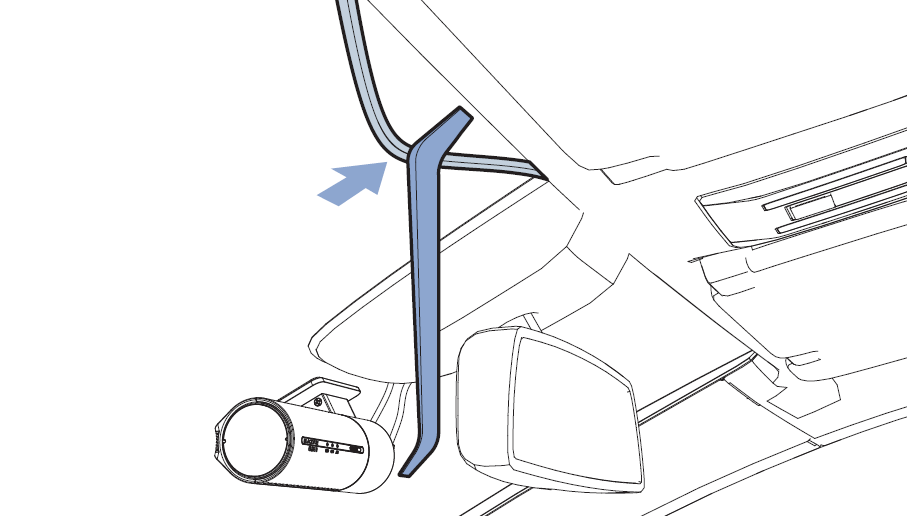
Step 3. Reattach to the Vehicle
-
Attach the new mount to the center of the windshield, align it horizontally, and press to secure it.
(Follow the same procedure for the rear camera.)
Step 4. Install the New Mount and Dashcamera
-
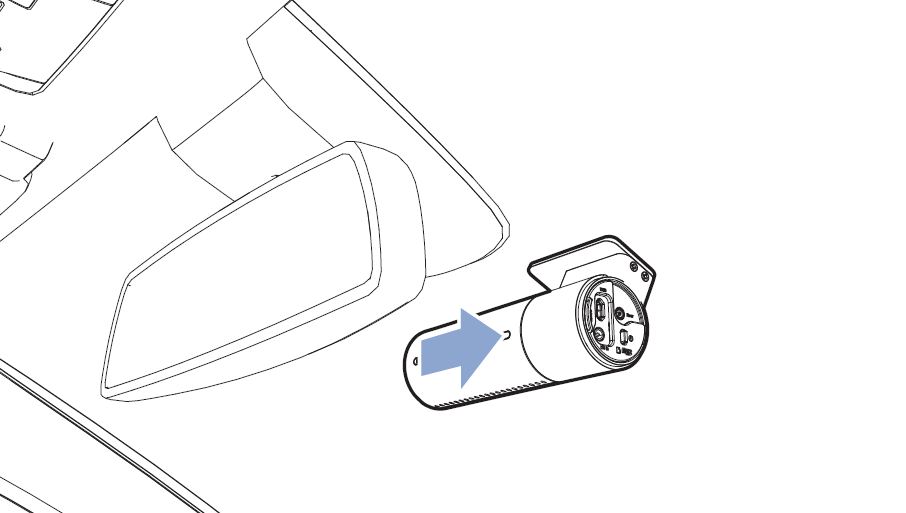
Attach the front and rear cameras (removed in Step 2) to the provided mount.
-
After securing the mount, leave it untouched for more than 12 hours before attaching the camera body to the mount.
Step 5. Organize and Test
-
Use the included removal tool and cable clips to organize the wiring.
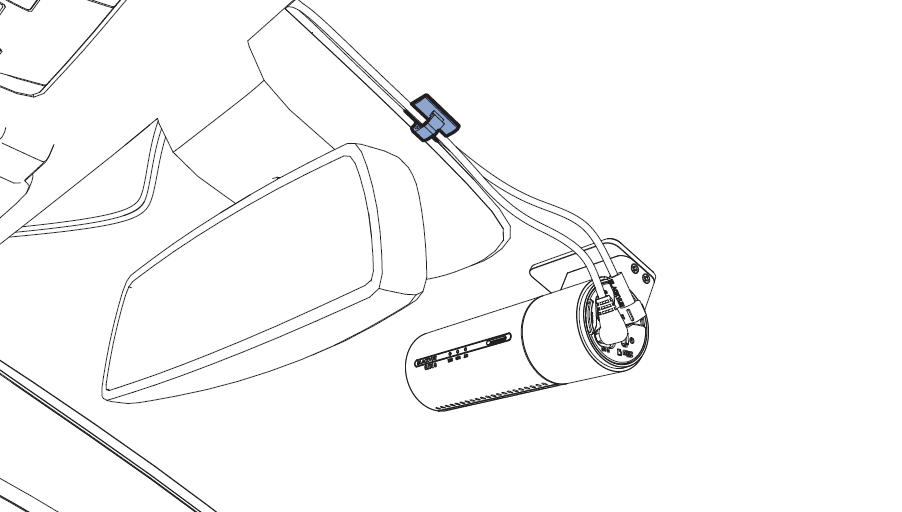
-
Clean the lenses and adjust the camera angle as shown in the image below to achieve the optimal recording position.
-
If necessary, check Wi-Fi connectivity and GPS reception.
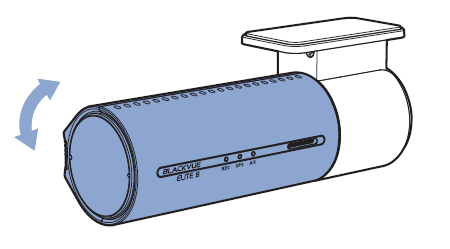
Front Camera Rear Camera
B. For Customers Installing an Additional Mount on a Second or New Vehicle #
Step 1. Select the Installation Position on the New Vehicle
-
Determine the mounting positions for the front and rear cameras.
-
It is generally recommended to install the cameras at the center of the windshield, within the wiper coverage area.
Step 2. Install the New Mount
-
Attach the included new mount to the center of the windshield, within the wiper coverage area.
-
Before attaching, clean the glass thoroughly and wait for it to dry completely. After attaching, leave it for 12 hours to ensure strong adhesion.
Step 3. Attach the Existing Camera
-
Mount the previously used camera body onto the newly installed mount.
Step 4. Organize the Cables
-
Use the included removal tool and cable clips to neatly arrange the wiring.
Step 5. Test and Finalize the Setup
-
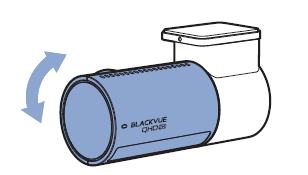
Clean the camera lens and adjust the camera angle as shown in the image below for optimal recording positioning.
-
If necessary, check the Wi-Fi connection and GPS reception.
Front Camera Rear Camera
#
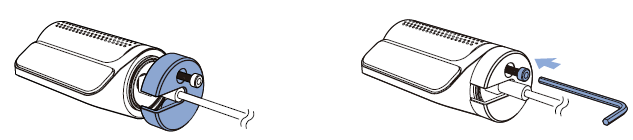
* For customers using the Box series, please refer to the information below for the mount assembly instructions.
Detach the tamperproof bracket from the front camera by rotating the screw counterclockwise with the allen wrench.
⚠️ Precautions Before Installation #
-
Be sure to remove any debris or foreign substances from the windshield surface before attaching the mount.
-
It is recommended to wait at least 12 hours after attaching the mount before driving, to allow the adhesive to stabilize.
-
Forcing the camera body in or out may damage the mounting area. Handle with care.


