BlackVue Dashcam Installation Guide #
Before You Begin #
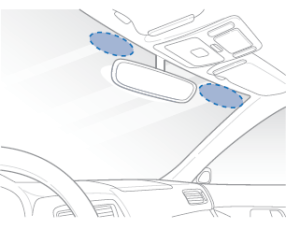
- Choose installation locations carefully:
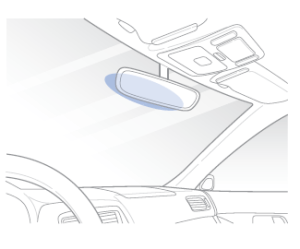
- Front camera: Behind the rear view mirror.
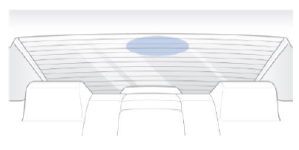
- Rear camera: At the top center of the rear windshield.
- Clean the windshield: Remove any dust, oil, or moisture before sticking the cameras.
- Peel off the protective film from both front and rear cameras to prevent overheating.
- Do not install the cameras where they might block the driver’s view.
![]() Note
Note
• For DR970X-1CH Series (II) user, the BlackVue rear camera is optional.
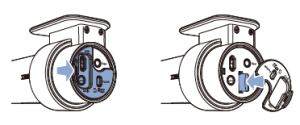
Step1. Insert the microSD Card #
- Turn off the vehicle engine.
- Open the microSD card slot cover on the front camera.
- Gently insert the card until it clicks into place and close the cover
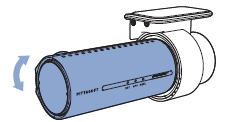
Step2. Mount the Front Camera #
- Remove the double-sided tape.
- Attach the front camera to the windshield, behind the rear view mirror.
- Adjust the lens angle by rotating the camera body.
💡Tips: Tilt the lens slightly downward (~10°) for a 6:4 road-to-sky ratio.
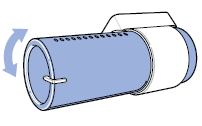
Step3. Mount the Rear Camera (if applicable) #
- Peel off the tape film and stick the rear camera to the rear windshield.
- Rotate the camera body to adjust the viewing angle.
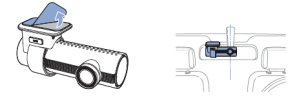
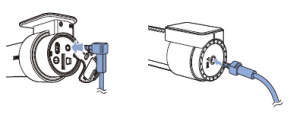
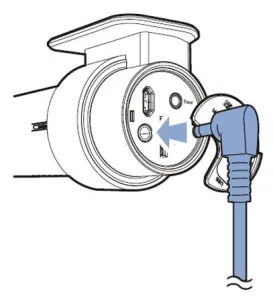
Step4. Connect the Front and Rear Cameras #
- Use the provided rear camera cable:
- Plug one end into the ‘Rear’ port of the front camera.
- Plug the other into the ‘V out’ port of the rear camera.
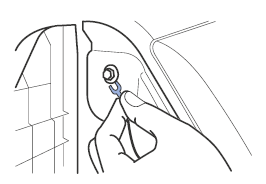
Step5. Hide the Rear Camera Cable #
- Use the pry tool to gently lift window moldings or rubber seals.
- Tuck the cable neatly along the edges for a clean look.
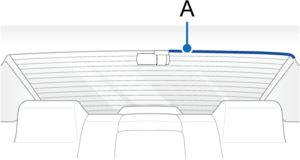
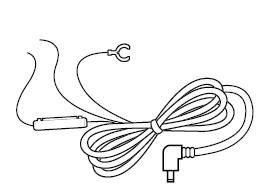
A – Rear camera connection cable
Powering Your Dashcam #
You can power your BlackVue dashcam in three main ways. Choose the option that matches your vehicle’s compatibility.
Option A. Using the USB-C PD 3.0 Power Cable #
Use this method if your vehicle has a Type-C port that supports PD 3.0 (Power Delivery 3.0).

1) Locate the Type-C Port in Your Vehicle
- Usually located near the passenger seat (varies by vehicle).
- Look for a lightning bolt symbol to confirm PD 3.0 support.
2) Connect the Cable to the Dashcam
- Plug the USB-C PD 3.0 Power Cable into the vehicle’s Type-C port, and the other end into the front camera’s DC-in port

3) Hide the Cable
- Use the pry tool to lift rubber seals and tuck in the cable neatly along window trim.

A) Rear camera cable / B) USB-C PD 3.0 Power Cable
4) Start the Engine
- The dashcam will automatically power on and start recording.
⚠️Caution
Parking Mode is not supported with USB-C power.
For full features, use a hardwiring kit or battery pack.
Option B. Using the Dual USB-C Car Charger (Type-C Adapter) #
Use this method if:
- Your vehicle doesn’t have a Type-C port, or
- The Type-C port doesn’t support PD 3.0.
1) Plug the Dual USB-C Car Charger into the 12V Outlet
- Insert the Dual USB-C car charger into your vehicle’s cigarette lighter socket.
- Connect the USB-C power cable to the USB-C port labeled “Dashcam” on the adapter.


2) Connect the USB-C PD 3.0 Power Cable
- Connect the cable from the adapter to the front camera’s DC-in port.
3) Hide the Cable
- Use the pry tool to lift rubber seals and tuck in the cable neatly along window trim.
A – Rear camera cable / B – USB-C PD 3.0 Power Cable
4) Start the Engine
- The camera will power on and begin recording automatically.
⚠️Caution
This method also does not support Parking Mode.
To record in parking mode while the engine is off, please connect the Hardwiring Power Cable or install a Power Magic Battery Pack (sold separately).
Option C: Using the Hardwiring Power Cable #
1) Locate your vehicle’s fuse box (check your car manual if unsure).
2) Remove the fuse box cover and identify:
3) A fuse that powers on with the engine (e.g. audio, cigarette lighter) – connect ACC+ here.
4) A fuse that’s always powered (e.g. hazard lights, dome light) – connect BATT+ here.
💡Tips: For parking mode and battery protection, connect BATT+ to the hazard light fuse.
5) Connect the GND (ground) wire to a metal bolt on the vehicle frame.
6) Plug the power cable into the front camera’s DC in port. The dashcam will power on and start recording.
Option D: Using the Battery (B-130A) #
This installation method involves using a dedicated external battery, the Power Magic Ultra Battery (B-130A), to power the dashcam. It is an effective option that provides stable power to the dashcam without burdening the vehicle’s main battery.
✅ Recommended For
- Users who need extended dashcam recording while parked
- Users who want to prevent battery discharge of the vehicle
- Users looking for a more reliable power source
🔧 Installation Overview #
The B-130A can be charged via the vehicle’s cigarette lighter socket or fuse box, and once fully charged, it supplies power independently to the dashcam.
📘 For detailed installation steps and precautions, please visit the following link:
https://manual.blackvue.com/docs/power-magic-ultra-battery-b-130a/installation/installation-b-130a/
DR970X-2CH Plus IR #
Model-Specific Preparation #
- Choose installation locations carefully:
- Front camera: Behind the rear view mirror.
- Interior/Rear camera : At top of the front or back windshield.
- Clean the windshield: Remove any dust, oil, or moisture before sticking the cameras.
- Peel off the protective film from both front and rear cameras to prevent overheating.
- Do not install the cameras where they might block the driver’s view.
Step 1. Mount the IR Camera #
- Peel off the tape film and stick the rear camera to the rear windshield.
- Rotate the camera body to adjust the viewing angle.

Step 2. Connect the Rear Camera IR Camera #
- Connect the rear camera cable to the ‘Rear’ port on the front camera.
- Connect the other end of the cable to the ‘V out’ port on the IR camera.
Step 3. Route the Power Cable and IR Camera connection Cable #
- Use the pry tool to lift the edge of the windshield trim or molding.
- Tuck the power cable into the gap to conceal it.

A) Interior/rear camera connection cable
B) Power cord


